How to create a flow in API Spector
 Roy de Kleijn · · 2 min read
A single request tests one call. Real scenarios are several calls in order, where each step depends on the one before. A flow chains requests into one runnable scenario, with logic and loops, on a visual canvas.
Why flows help
- Chain dependent calls: create a resource, read it back, update it, then delete it, in one run.
- Pass data between steps: capture an id or a token from one response and use it in the next.
- Add logic: branch on a condition, stop on a failure, or loop over a list of inputs.
- One result: a flow passes or fails as a whole, with a run log and an exportable report.
- Run it anywhere: from the app, the CLI, or the cloud.
1. Create a flow
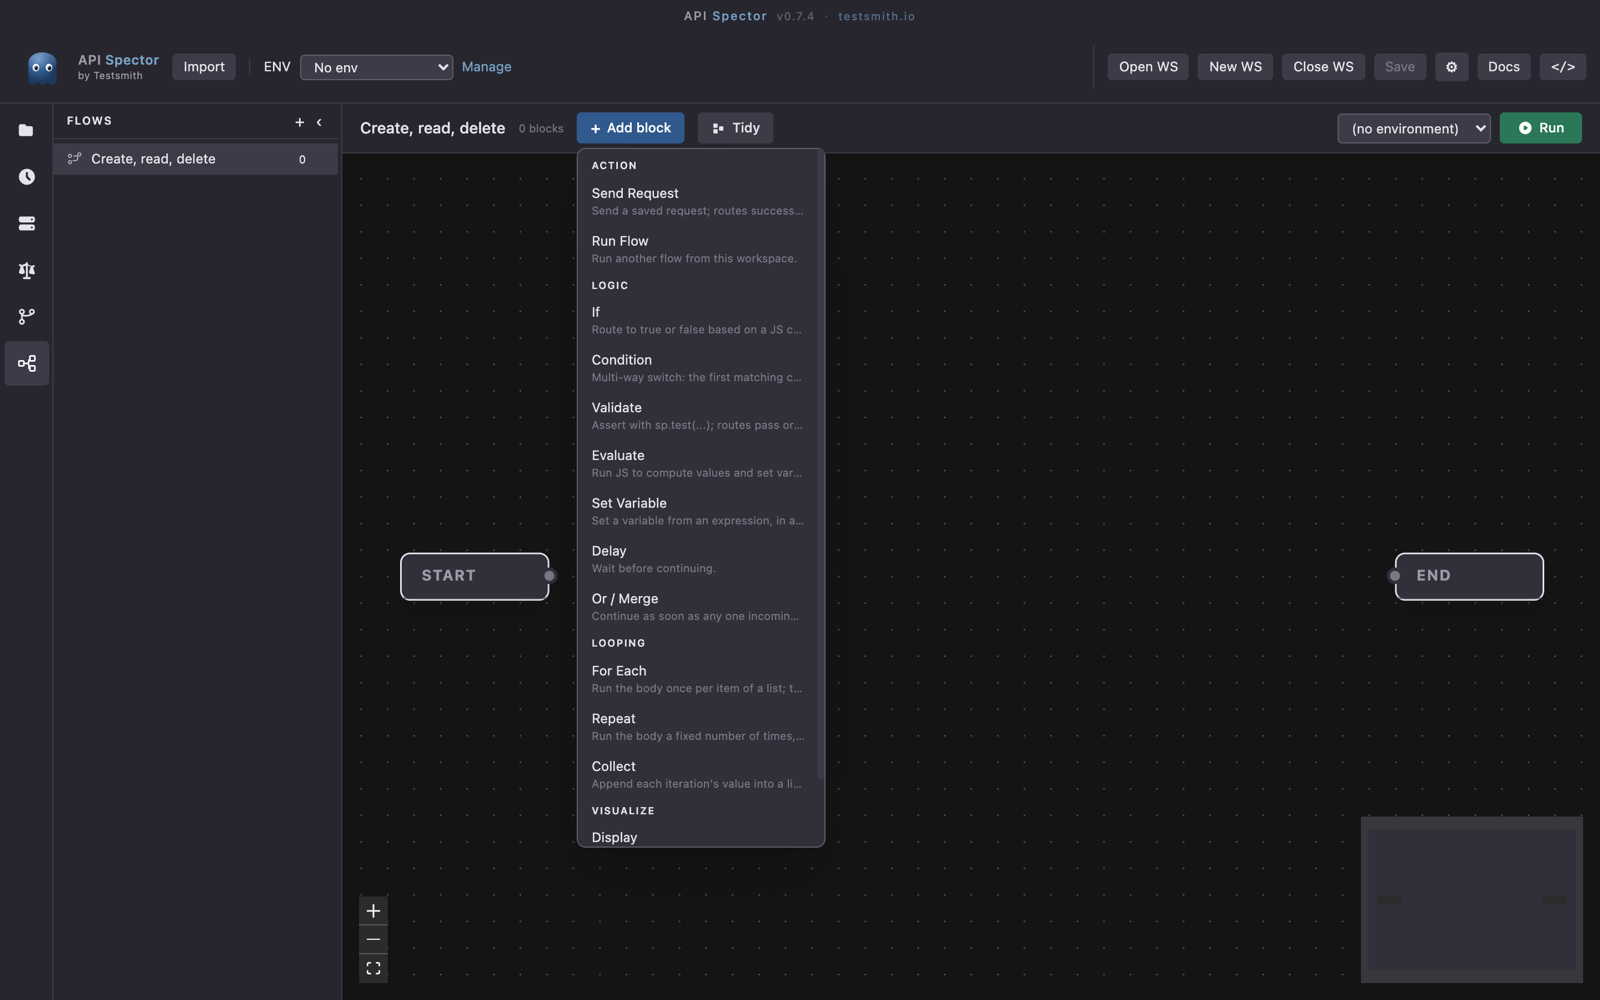
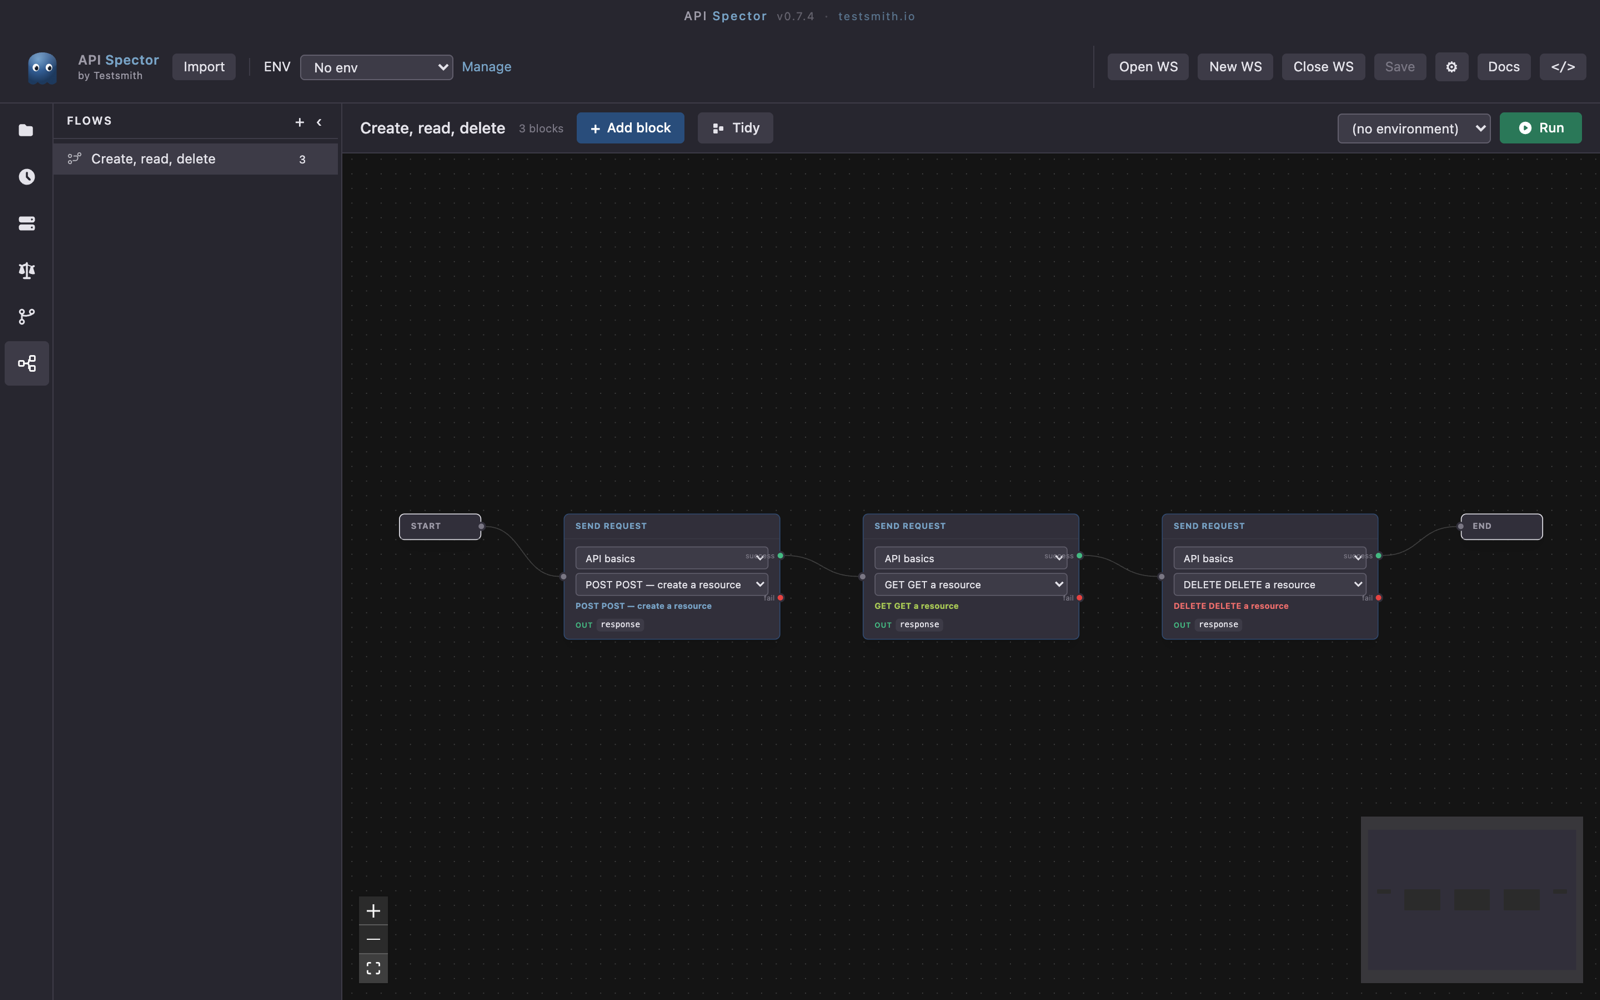
Click the Flows icon in the activity bar, then + to add a flow. The main area becomes a canvas with a Start and an End block.
2. Add blocks
Press + Add block. Blocks are grouped by purpose: Action (Send Request, Run Flow), Logic (If, Condition, Validate, Evaluate, Set Variable, Delay), Looping (For Each, Repeat, Collect), and Visualize (Display, Log). Drop a Send Request block and pick one of your saved requests.
3. Connect the steps
Drag from one block's output port to the next block's input. A Send Request block has separate success and fail ports, so you can route a failure down a different path, for example to a cleanup step.
4. Run
Pick an environment and press Run. The bottom panel shows the Run log, the Output, and the Variables, with a pass, fail, and error count and a duration. Export an HTML report or the log when you are done.
Run it beyond the app
A flow is not only for the desktop. Run it headless from the CLI with api-spector flow run <name>, or push it to API Spector Cloud and run it there on a schedule.