How to send your first request in API Spector
 Roy de Kleijn · · 3 min read

This guide covers the core loop in API Spector: create a collection, add a request, send it, and read the response. It takes a couple of minutes, and you do not need an account.
Open a workspace
API Spector works inside a workspace, which is a .spector file you can commit to Git. When you first open the app you will see the welcome screen with Open Workspace, New Workspace, and Open from Git. Pick New Workspace to start fresh. Your requests and collections live in that file; secrets go to your OS keychain, never to disk.
1. Create a collection
Collections group related requests. In the Collections panel on the left, click the + button. A collection named New Collection appears. If you already have requests elsewhere, use the Import button in the toolbar instead, which reads Postman, OpenAPI, Insomnia, and Bruno.
2. Add a request
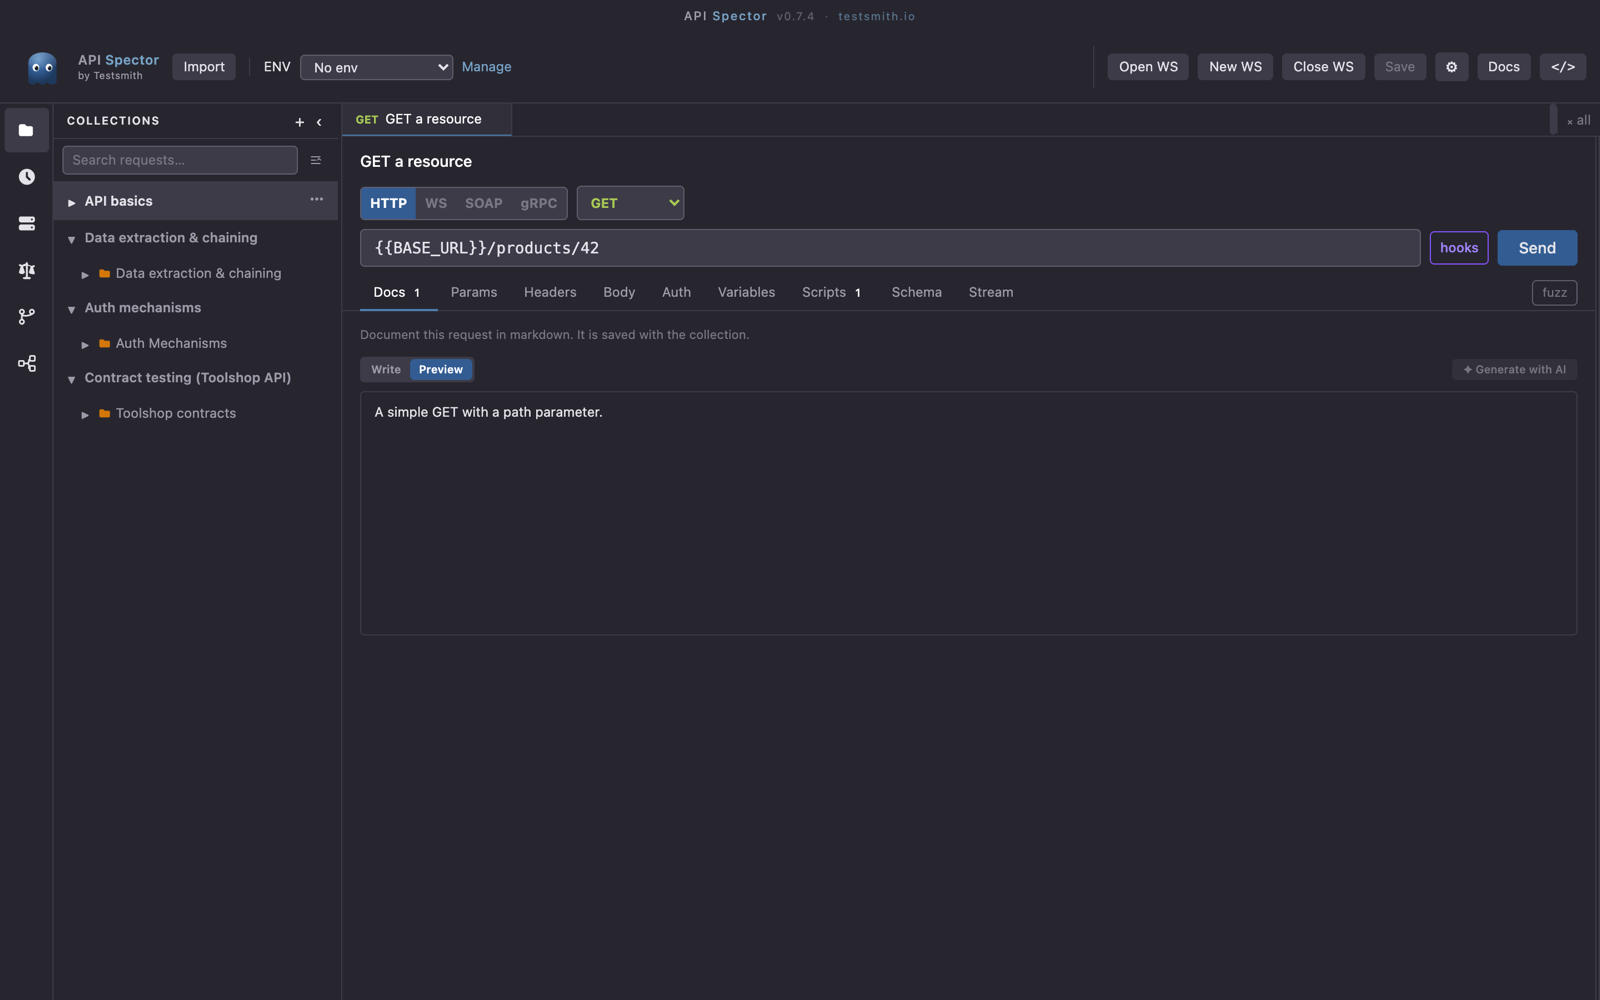
Open the collection's ⋯ menu and choose Add request. The request opens in a new tab with the method set to GET.
3. Set the method and URL
Pick a method from the dropdown (GET, POST, PUT, PATCH, DELETE, and others, plus Custom… for any verb). Type a URL in the address bar, for example:
https://api.github.com/repos/testsmith-io/api-spector
The URL bar understands {{variable}} placeholders, so you can reference environment variables here later. If you paste a URL with a query string, API Spector splits the parameters into the Params tab for you. The request tabs below are Params, Headers, Body, Auth, Variables, Scripts, Schema, and Stream.
4. Send
Click Send, or press Cmd/Ctrl + Enter. The request fires locally from your machine; nothing is proxied through a server.
5. Read the response
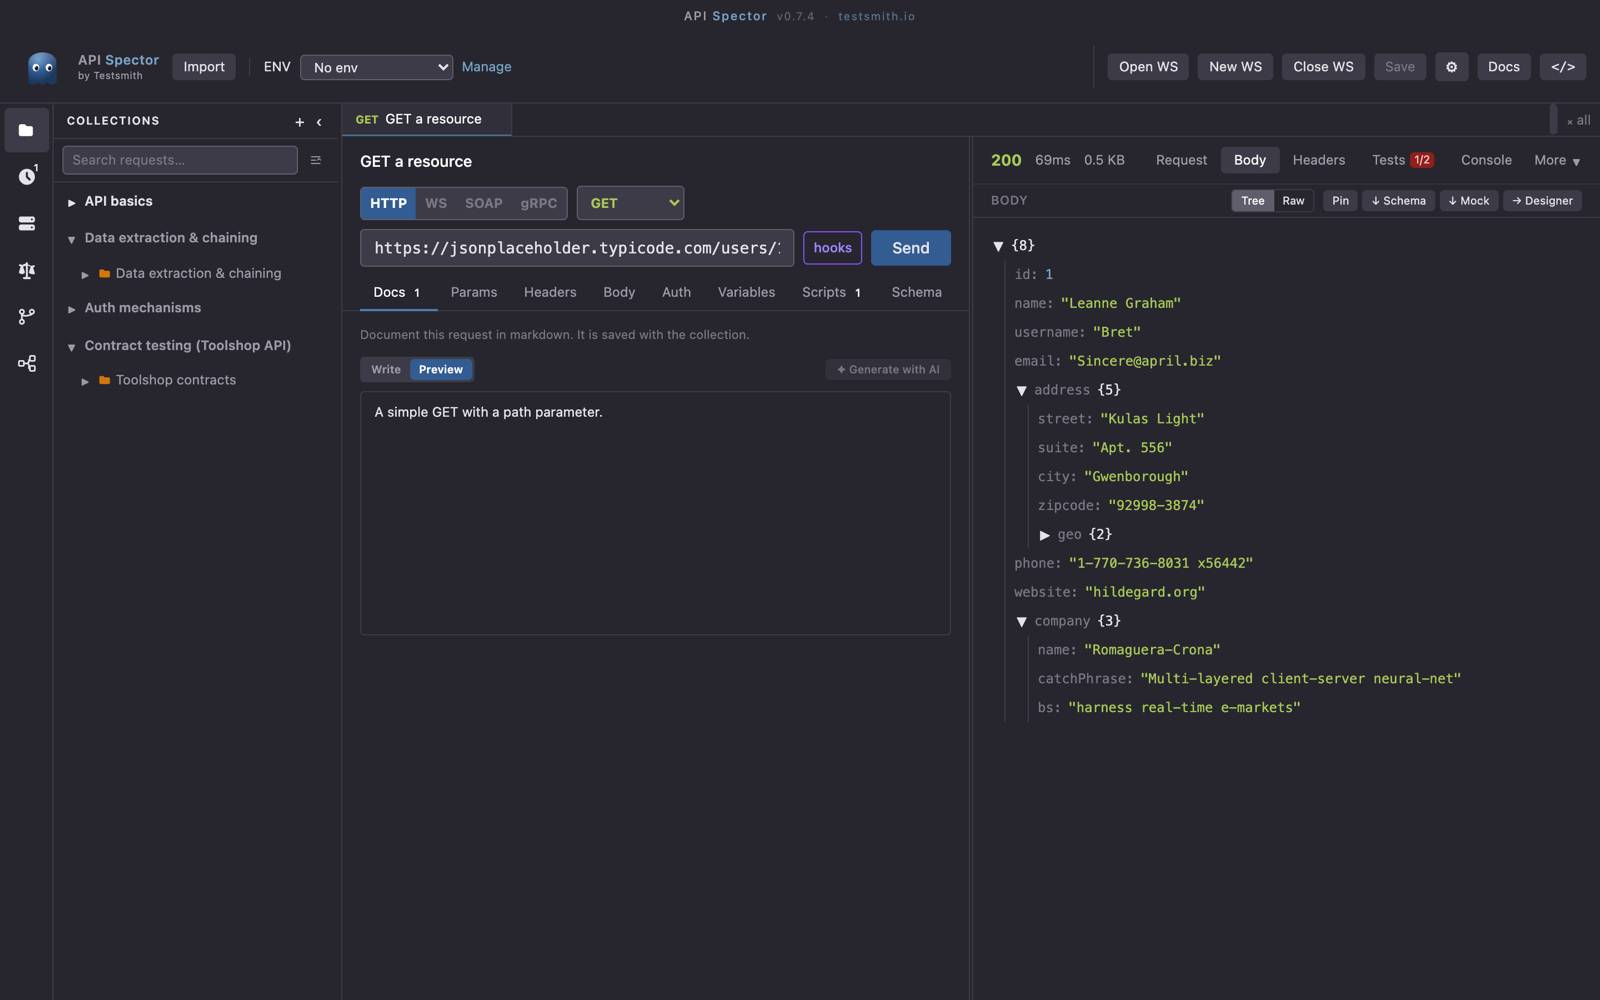
The response panel shows the status code, the time in milliseconds, and the size. The body has three view modes:
- Tree: an interactive view where you can click a value to turn it into an assertion.
- Raw: the plain body, with JSON and XML pretty-printed automatically.
- Table: for responses that are arrays, shown as a sortable table.
The tabs across the top are Request, Body, Headers, Tests, Console, History, and HTTP. The History tab records every send for that request, so you can reload or resend an earlier call.
6. Save
API Spector autosaves as you work. The Save button in the toolbar flushes everything to disk and shows an amber dot when there are unsaved changes.
What to try next
- From the response panel, use ↓ Mock to turn the response into a mock route, or ↓ Schema to save a JSON Schema from it.
- Add an environment so you can swap
baseUrlbetween local, staging, and production without editing the request. - Group related requests into folders, then run the whole folder at once.
That is the loop: add, send, read, save. Everything stays on your machine until you decide to share it.